Category: Uncategorized

  • How to Build Your First Kit Email Automation

    This post contains affiliate links. If you purchase through my links, I may earn a commission at no extra cost to you.

    If you’ve just signed up for Kit (formerly ConvertKit) and stared at the dashboard wondering where to start, this tutorial walks you through exactly what to do. Learning how to build your first Kit email automation is the highest-leverage action you can take in your first week on the platform — it turns a one-time form submission into an ongoing, hands-off subscriber journey.

    By the end of this guide, you’ll have a live automation that welcomes new subscribers, tags them by source, and delivers a sequence of emails — all without manual effort after setup.

    What you’ll need: A Kit account. The free Newsletter plan supports up to 10,000 subscribers and includes one Visual Automation — enough to complete every step below. ▶ Try Kit for free


    What Is a Kit Visual Automation?

    Before opening any settings, understand what you’re actually building.

    A Visual Automation in Kit is a flowchart-style canvas. You place nodes — triggers, actions, and conditions — and connect them with arrows. When a subscriber matches the trigger (such as submitting a specific form), Kit routes them down the path you’ve drawn: sending emails, applying tags, waiting set intervals, and optionally branching based on behavior.

    According to Kit’s Visual Automations documentation, Visual Automations are distinct from simple sequences: a sequence is a linear list of emails; the automation is the branching logic that controls when and to whom those sequences run.

    Verified plan availability (as of June 2025):
    – Newsletter (free): One Visual Automation, unlimited broadcasts, tagging and segmentation, up to 10,000 subscribers.
    – Creator ($33/month, 1,000 subscribers, billed annually): Unlimited Visual Automations and sequences.
    – Pro ($66/month, 1,000 subscribers, billed annually): Adds Subscriber Signals, engagement analytics, deliverability reporting, and the newsletter referral system.

    Always confirm current pricing at kit.com/pricing before purchasing.


    Before You Build: Three Things to Prepare

    Jumping into the builder without preparation is the most common beginner mistake. Spend ten minutes here first.

    1. Define the trigger

    Ask: what subscriber action should start this automation? The most common answer is “submits a specific form.” Decide which form that is before opening the builder — vague starting points produce tangled automations.

    2. Draft your sequence emails

    You don’t need polished copy, but you need to know how many emails you’re sending and what each one covers. Building an automation around blank stubs leads to disconnected logic and publishing errors.

    3. Plan your tags

    Tags in Kit are labels applied to subscribers based on behavior or source. Before building, decide what you want to know about a subscriber once they complete the automation. Common examples: lead-magnet-downloaded, completed-welcome-series, interested-in-[product]. Naming them now prevents a messy tag library later.


    How to Build Your First Kit Email Automation: 6 Steps

    Step 1 — Create Your Opt-In Form

    Navigate to Grow → Landing Pages & Forms in the left sidebar.

    Click Create New, then choose Form (for embedding on your site) or Landing Page (a standalone hosted page). Give it a specific, descriptive name — “Free Guide — Homepage” is more useful than “Form 1” when you’re choosing it from dropdowns later.

    Screenshot-worthy moment: The form builder shows a live preview on the right side as you edit fields and styling on the left. Note the form name in the top-left — this is what appears in the automation builder’s trigger dropdown.

    Before leaving, open Settings → General and set the confirmation behavior: double opt-in (sends a confirmation email) or single opt-in (auto-confirms subscribers). Double opt-in generally produces a smaller but more engaged list; single opt-in maximizes conversions. Neither is universally correct — it depends on your audience and deliverability goals.

    Step 2 — Open the Visual Automation Builder

    Go to Automate → Visual Automations and click New Automation.

    Screenshot-worthy moment: You land on an empty canvas with a single dashed-border node labeled “Add a trigger” in the center. Everything in your automation flows from this starting point.

    Kit offers two starting options: Start from scratch or Use a template. For your first automation, choose scratch — working through each node manually builds genuine understanding of how the logic fits together.

    Step 3 — Set the Trigger

    Click the trigger node. A right-side panel opens with trigger options including:

    • Joins a form
    • Joins a sequence
    • Completes a sequence
    • Purchases a product
    • Added to a tag
    • Custom field updated

    Select “Joins a form” and choose the form you created in Step 1 from the dropdown.

    Common mistake: Selecting the wrong form. If you have multiple forms, the names in the dropdown mirror the names you set in Step 1. Descriptive form names prevent real confusion here — generic names like “Form 2” look identical until something breaks.

    Click Save. The trigger node now displays your form’s name.

    Step 4 — Add an Entry Tag

    Click the + button below the trigger node → select “Add tag”.

    Either select an existing tag or type a new one (Kit creates it automatically). For this tutorial, create entered-welcome-automation.

    Why tag at entry? It gives you a reliable way to find every subscriber who entered this specific automation, regardless of other forms they submit or automations they join later. It also protects against delivering a duplicate welcome series if you add additional entry points down the road.

    Screenshot-worthy moment: After saving, the canvas shows two connected nodes: your form trigger → add-tag action. The visual flow is readable at a glance, even at this early stage.

    Step 5 — Create and Attach Your Email Sequence

    Click + below the tag node → select “Email sequence”.

    You’ll be prompted to create a new sequence or select an existing one.

    Creating a new sequence from inside the builder:

    1. Name the sequence (e.g., “Welcome Series — Free Guide”).
    2. Kit opens the sequence editor. Add Email 1: write the subject line and body, then set the delay to “Immediately.”
    3. Add subsequent emails with delays such as “2 days after previous email” or “5 days after previous email.”
    4. A 3–5 email welcome series is a practical starting range for most creator businesses.
    5. Click Back to Automation when finished.

    The sequence node now appears on the canvas, connected to your tag action.

    Critical tip: Set Email 1 to send immediately (zero delay). Subscribers who just opted in are most attentive in the first few minutes. A delayed first email is one of the most common momentum-killers in welcome sequences.

    Pitfall: Any email in a sequence left in “Draft” status will be silently skipped. Kit does not warn you at activation. Check that every email is set to Published before going live.

    Step 6 — Add an Exit Tag and Activate

    Click + below the sequence node → select “Add tag” → create completed-welcome-series.

    This closing tag serves two purposes: it cleanly marks subscribers who finished the series, and it can serve as a trigger for a follow-up automation later — for example, a sales sequence that only starts after someone completes your nurture flow.

    Final checklist before activating:

    • [ ] Trigger points to the correct form
    • [ ] Entry tag is applied immediately after the trigger
    • [ ] Sequence contains at least one email, set to Published
    • [ ] Email delays are logical (not all zero)
    • [ ] Exit tag is placed after the sequence
    • [ ] The opt-in form itself is Published (not still in Draft)

    When satisfied, click the Pause toggle in the top-right corner of the canvas. It switches to Live.

    Screenshot-worthy moment: The status badge turns green. Subscriber counts on each node will increment in real time as people move through the flow.


    Worked Example: Free Checklist to Digital Product Sale

    Scenario: Maya sells a $49 Notion productivity template. She offers a free “Weekly Review Checklist” as a lead magnet on her website.

    Node Configuration
    Trigger Joins form: “Checklist Download — Homepage”
    Action 1 Add tag: checklist-subscriber
    Sequence “Welcome + Nurture” — 5 emails over 10 days
    Condition Clicked link in Email 4 (product teaser)?
    Branch A (Yes) Add tag: warm-lead → enter “Sales Sequence”
    Branch B (No) Add tag: completed-nurture-cold

    Email timing: Email 1 sends immediately (delivers the checklist). Emails 2–4 go out on days 2, 5, and 8 with productivity content relevant to her audience. Email 5 on day 10 introduces the Notion template with a soft CTA.

    The conditional branch after Email 4 routes subscribers based on whether they clicked the product teaser link: engaged subscribers enter a direct sales sequence; unengaged subscribers receive a cold-subscriber tag for a separate re-engagement campaign later.

    Note: Conditional branching based on link clicks is a documented feature of Kit’s Visual Automations. Confirm the exact configuration steps in your own account, as interface details can evolve between updates.


    Common Mistakes to Avoid

    Leaving emails in Draft status. Kit silently skips draft emails during delivery. Always publish every email in a sequence before activating the automation.

    Setting all delays to zero. Sending five emails in rapid succession generates unsubscribes and spam complaints. Space emails to match the value cadence — not your eagerness to pitch.

    One automation for multiple audiences. Keep automations focused. If you have a free checklist and a paid course opt-in, build separate automations. Mixing audiences creates tag conflicts and incoherent subscriber experiences.

    Skipping a live test. Subscribe to your own form using a secondary email address before sending the automation to your real audience. Walk the full subscriber journey to confirm every email arrives, every link works, and every delay feels right.

    Forgetting to publish the form. Your automation can be live while the form is still in Draft. The automation will never trigger. Publish the form separately under Grow → Landing Pages & Forms.


    Which Kit Plan Do You Actually Need?

    Requirement Newsletter (Free) Creator ($33/mo) Pro ($66/mo)
    One welcome automation ✅ ✅ ✅
    Multiple automations ❌ ✅ ✅
    Unlimited sequences ❌ ✅ ✅
    Sell digital products ✅ ✅ ✅
    Up to 10,000 subscribers on free ✅ — —
    Subscriber Signals + engagement analytics ❌ ❌ ✅
    Deliverability reporting ❌ ❌ ✅
    Newsletter referral system ❌ ❌ ✅

    Creator and Pro pricing shown for 1,000 subscribers billed annually. Subscriber-tier pricing scales up — check kit.com/pricing for your specific list size.

    Practical read (informed analysis): The free Newsletter plan is genuinely functional for a first automation. The single-automation limit only becomes a constraint once you want separate flows for different lead magnets, products, or audience segments — at which point the Creator plan is the logical upgrade. The Pro plan’s analytics and referral features are harder to justify until you have an established list and are actively optimizing deliverability and growth.


    Next Steps

    You now have a live automation waiting for its first subscriber. Here’s what to do immediately:

    1. Run a live test — subscribe via your own form using a secondary email address and confirm the flow works end to end.
    2. Audit sequence email statuses — every email must show “Published.”
    3. Review your form’s confirmation setting — double-check whether single or double opt-in is right for your audience and funnel.
    4. Plan your second automation — common next choices are a post-purchase onboarding sequence or a re-engagement campaign for cold subscribers.

    Building your first Kit automation takes well under an hour following these steps. The free plan provides enough capability to run it properly before you commit to a paid tier.

    ▶ Try Kit for free


    Pricing and plan details in this article are drawn from Kit’s official sources and were verified on 19 June 2025. Confirm current terms at kit.com/pricing before making any purchasing decision.

  • Omnisend Review for Shopify Email and SMS: Honest Take

    This post contains affiliate links. If you purchase through my links, I may earn a commission at no extra cost to you.


    Omnisend Review for Shopify Email and SMS: The Short Answer

    If you run a Shopify store and want email and SMS marketing in one place — without paying for and managing two separate subscriptions — Omnisend is worth a serious look. It is built specifically for ecommerce, ships with pre-built automations covering the highest-value customer touchpoints, and offers a free plan so you can connect your store and test before committing a budget.

    That said, it is not the right tool for everyone. If you’re a content creator, B2B software company, or service business without a product catalog, the ecommerce focus becomes a mismatch rather than an advantage. And because pricing scales with contact count, the economics change as your list grows — verify current plan limits and pricing directly on Omnisend’s official pricing page before assuming the numbers work for your situation.

    This omnisend review for shopify email and sms covers who benefits, what the platform actually does, its genuine limitations, and a worked example of how the automations function in practice.

    ▶ Try Omnisend free


    What Is Omnisend and Who Is It Built For?

    Omnisend is an email and SMS marketing platform designed from the ground up for ecommerce merchants. Unlike general-purpose email tools that treat SMS as a bolt-on module, Omnisend treats both channels as first-class citizens within the same workflow. It integrates natively with Shopify, BigCommerce, WooCommerce, and Wix.

    The core premise: connect your store, and customer records, purchase history, and behavioral data flow in automatically. That enables you to trigger messages based on real shopping actions — not just form submissions.

    Who the platform is primarily designed for:

    • Shopify store owners ready to move beyond one-off newsletter blasts
    • Merchants who want email and SMS running from a single interface
    • Ecommerce brands that want pre-built, launch-ready automations without building logic from scratch
    • Stores at early to mid-scale that want professional-grade marketing without enterprise complexity

    Core Features: What You Actually Get

    Email Marketing

    Omnisend provides a drag-and-drop email editor with ecommerce-specific content blocks, including product pickers that pull items directly from your connected store catalog. This removes the friction of manually copying product images and URLs into each campaign.

    Segmentation is built around purchase behavior — what customers bought, how many orders they have placed, how recently they purchased — rather than generic demographic fields. For a store trying to re-engage lapsed buyers or reward repeat customers, this is more actionable than basic list management.

    SMS Marketing

    SMS is integrated directly into the same automation workflows as email, not maintained as a separate module. A single automation can send an email first, wait a defined period, and follow up via SMS if no action was taken. This kind of multichannel sequencing is one of Omnisend’s most cited differentiators: you do not need to synchronize logic across two platforms.

    SMS availability varies by country. Before making SMS coverage a purchase driver, verify which regions are currently supported on the Omnisend features page.

    Pre-Built Ecommerce Automations

    This is where Omnisend earns its reputation among Shopify merchants. The platform ships with ready-to-activate workflows for the most revenue-critical moments:

    • Welcome series — greets new subscribers and can include a discount to drive a first purchase
    • Abandoned cart — triggers when a shopper adds items to their cart but leaves without completing checkout
    • Browse abandonment — triggers when a visitor views a product page but exits without adding anything to the cart
    • Order confirmation and shipping updates — post-purchase transactional messages that keep customers informed

    These automation types exist across most email platforms in theory. Omnisend’s versions are pre-configured with ecommerce logic already baked in — the intent is to activate, customize the copy, and go, rather than build the conditional branching yourself.

    Popups and Signup Forms

    Omnisend includes on-site list-building tools: popups, landing pages, and embedded forms. These can be configured to collect both email address and phone number simultaneously at the point of signup, which is a meaningful compliance consideration for US and EU merchants where SMS consent requirements are strict.


    A Worked Example: The Abandoned Cart Sequence in Practice

    Scenario: A Shopify store selling handmade skincare products. Average order value: $55. Monthly sessions reaching the checkout page: approximately 1,500. Checkout abandonment rate: ~70% — a commonly cited industry benchmark for ecommerce.

    That works out to roughly 1,050 abandoned checkouts per month. Even recovering 5% of those — 52–53 orders — at $55 AOV adds approximately $2,900 in monthly revenue from a sequence that runs automatically after initial setup.

    Here is how a three-step abandoned cart sequence might be structured within Omnisend:

    Step Channel Timing Purpose
    1 Email 1 hour after abandonment Soft reminder, no incentive yet
    2 Email 24 hours after abandonment Reinforce product value
    3 SMS 48 hours after abandonment Short, direct nudge — optionally with a small discount code

    The SMS step in Step 3 is strategically important: customers who have already seen two emails without converting are often better reached via a different channel. Having both channels in the same workflow — rather than managing them separately — reduces the operational overhead and the risk of double-sending.

    Note: The 70% abandonment rate above is a commonly cited industry reference, not a guarantee of any specific result. Actual recovery rates depend on your product, audience, and message quality.


    Pricing: What You Need to Know Before Committing

    Omnisend offers a free plan that allows new users to connect their store and explore the platform before spending anything. Paid plans are structured around contact count — the more contacts you have, the higher the monthly cost.

    Because pricing tiers, contact thresholds, and send limits are updated periodically, this review does not quote specific figures. Citing stale numbers would be actively misleading.

    Verify the following directly on Omnisend’s pricing page before signing up:

    • The contact threshold at which you move from free to paid
    • Email send volume limits per plan level
    • Whether SMS credits are included or purchased separately
    • How cost-per-contact scales as your list grows — this is where the bill can accelerate faster than expected

    The general pattern is consistent with the industry: the free plan suits small lists with modest send volumes. Paid tiers unlock higher limits, the full automation library, and priority support. Stores that aggressively grow their list through on-site popups should model the cost trajectory before committing.

    ▶ Try Omnisend free


    Strengths and Weaknesses

    Strengths

    Purpose-built for ecommerce. Purchase data, product catalogs, and order history are native inputs — not workarounds. For Shopify merchants in particular, the direct integration reduces configuration friction.

    Email and SMS in one workflow. Multichannel sequences without synchronizing two platforms means less operational complexity, fewer opportunities for contacts to fall out of sync, and a single place to review automation performance.

    Pre-built automations lower the barrier. A merchant who is not a marketing specialist can activate a working abandoned cart sequence without constructing logic from scratch. This matters for solopreneurs and small teams who do not have a dedicated marketing hire.

    Free plan reduces commitment risk. Testing on a live store before paying is a genuine advantage, particularly at early stages when cash flow is constrained.

    Ecommerce-native segmentation. Segments based on order count, purchase recency, and product category bought are more immediately actionable for retail than generic demographic filters.

    Weaknesses

    Pricing scales steeply with list size. Contact-based pricing is standard across the industry, but it can surprise merchants whose lists grow faster than their revenue. Audit your current list size and growth rate before choosing a plan.

    SMS coverage is not universal. If your customers are concentrated in markets with limited SMS support, this feature may not be relevant to your store. Confirm geographic availability before treating SMS as a purchase driver.

    Not suited for non-ecommerce businesses. The automations and segmentation logic are built around transactional shopping behavior. Service businesses, content publishers, and B2B companies will find the ecommerce orientation a persistent friction rather than a benefit.

    Advanced customization requires time. The pre-built workflows are accessible. Building deeply customized automation logic with complex conditional branches is possible but involves a learning curve beyond the defaults.

    Reporting depth varies by plan. More granular analytics tend to live on higher-tier plans. If data-led optimization is central to your process, verify what reporting is available at the plan level you are considering before signing up.


    Decision Table: Is Omnisend the Right Fit?

    Your Situation Fit Assessment
    Shopify store owner wanting email + SMS in one platform ✅ Strong fit
    Early-stage store testing before committing budget ✅ Free plan makes sense here
    WooCommerce or BigCommerce merchant ✅ Natively supported
    Blogger or newsletter writer with no product catalog ❌ Wrong tool — better alternatives exist
    B2B SaaS or service-based business ❌ Ecommerce focus won’t serve you well
    Merchant with customers in limited SMS coverage regions ⚠️ Verify SMS availability first
    Fast-growing list, price-sensitive budget ⚠️ Model the cost trajectory carefully
    Large enterprise needing deep custom integrations ⚠️ Evaluate enterprise capabilities directly with Omnisend

    Who Should Skip Omnisend

    Omnisend is not a general-purpose email marketing platform. If any of the following describe your situation, your time is better spent evaluating other tools:

    • You sell services, not physical or digital products. The automation logic assumes a product catalog, cart events, and order history. None of those exist in a service-based business context.
    • You primarily run a content newsletter. Platforms built for content-first audiences handle monetization models, subscriber engagement scoring, and publication workflows that Omnisend does not prioritize.
    • Your customers are concentrated in countries with limited SMS support. If you cannot use SMS meaningfully, you are partially paying for a channel that does not serve your audience.
    • You need robust CRM functionality. Omnisend manages customer data in the context of marketing messages. It is not a full CRM. If you need deep customer relationship tracking beyond purchase behavior, evaluate whether a dedicated CRM is required alongside it.

    The Verdict

    For Shopify merchants who want email and SMS marketing without the overhead of two separate tools, Omnisend is a coherent, ecommerce-specific solution. The pre-built automations — abandoned cart, browse abandonment, welcome series, post-purchase updates — cover the highest-value touchpoints in a direct-to-consumer store’s customer journey. The free plan lowers the cost of testing whether it fits your workflow.

    The caveats are real and worth taking seriously: pricing scales with contact count (model this before aggressively growing your list), SMS coverage is geographically uneven, and the ecommerce orientation makes the platform a poor choice for anything outside online retail.

    If your Shopify store is currently running email through a general-purpose tool and handling SMS separately — or not at all — Omnisend is a reasonable consolidation candidate. Connect your store on the free plan, activate the abandoned cart automation, and assess whether the platform’s logic matches how your store operates before moving to a paid tier.

    Before signing up: Confirm current plan limits, pricing tiers, and SMS country coverage directly on the Omnisend pricing page, as these details are updated periodically and cannot be guaranteed accurate in this review.

    ▶ Try Omnisend free

  • ConvertKit vs Mailchimp for Creators [2026 Guide]

    An independent creator weighs two paths in the convertkit vs mailchimp for creators decision: an integrated audience business and a connected online shop.

    This post contains affiliate links. If you purchase through my links, I may earn a commission at no extra cost to you.


    If you’re a content creator — a newsletter writer, course seller, blogger, or digital product maker — the question of ConvertKit vs Mailchimp for creators is one you’ll hit early and often. Both tools are household names in the email marketing space, but they’re built for genuinely different users. (Quick naming note: ConvertKit officially rebranded to Kit in 2024. The product is the same; you may still see “ConvertKit” in integrations, search results, and older documentation. Both names refer to the same platform throughout this article.)

    Here’s the short answer: Kit (formerly ConvertKit) is purpose-built for creators who want automation, subscriber tagging, and the ability to sell digital products without bolting on extra tools. Mailchimp is stronger for small product-based businesses that need deep e-commerce integrations, a wide template library, and a lower entry price.

    Neither tool is universally better. This guide gives you exact pricing, a feature comparison table, a worked real-world example, and a clear “pick X if / pick Y if” framework. Read the section that matches your situation and act on it.


    Pricing: What You’ll Actually Pay

    Pricing shapes which tool is realistic for your current stage. Here’s how they compare — verify exact numbers at each platform’s official page before purchasing, as both update pricing periodically.

    Kit (formerly ConvertKit) Pricing

    Kit runs three tiers (see current pricing at kit.com/pricing):

    • Newsletter ($0/month): Supports up to 10,000 subscribers, one basic Visual Automation, unlimited broadcasts, tagging, landing pages, forms, and digital product or subscription sales.
    • Creator ($33/month for 1,000 subscribers when billed annually): Adds unlimited Visual Automations and sequences, integrations, A/B subject-line testing, and removes Kit branding.
    • Pro ($66/month for 1,000 subscribers when billed annually): Adds Subscriber Signals, engagement analytics, unlimited users, advanced testing, deliverability reporting, and the newsletter referral system.

    The free plan is worth exploring if you’re not ready to commit — you can test the interface and build landing pages without a credit card. Once you’re actively building a list or running automated sequences, you’ll need the Creator tier.

    Mailchimp Pricing

    Mailchimp offers four tiers (see current pricing at mailchimp.com/pricing):

    • Free: A limited plan intended for businesses with fewer than 250 contacts (Mailchimp reduced this from 500 in January 2026).
    • Essentials: Adds more sending capacity, templates, support, and testing features. Mailchimp currently advertises promotional pricing, so check the renewal price rather than comparing only the introductory rate.
    • Standard: Adds broader automation, segmentation, and optimization features. The displayed price changes with contact count, billing term, region, and active promotion.
    • Premium: Enterprise-oriented features and support at a substantially higher contact-based price.

    Bottom line on price: Do not compare the two services using a single headline price. Set the same contact count and billing period on both official calculators, then compare the plan that includes the automation and commerce features you actually need.


    Features That Matter for Creators

    Email Automation & Sequences

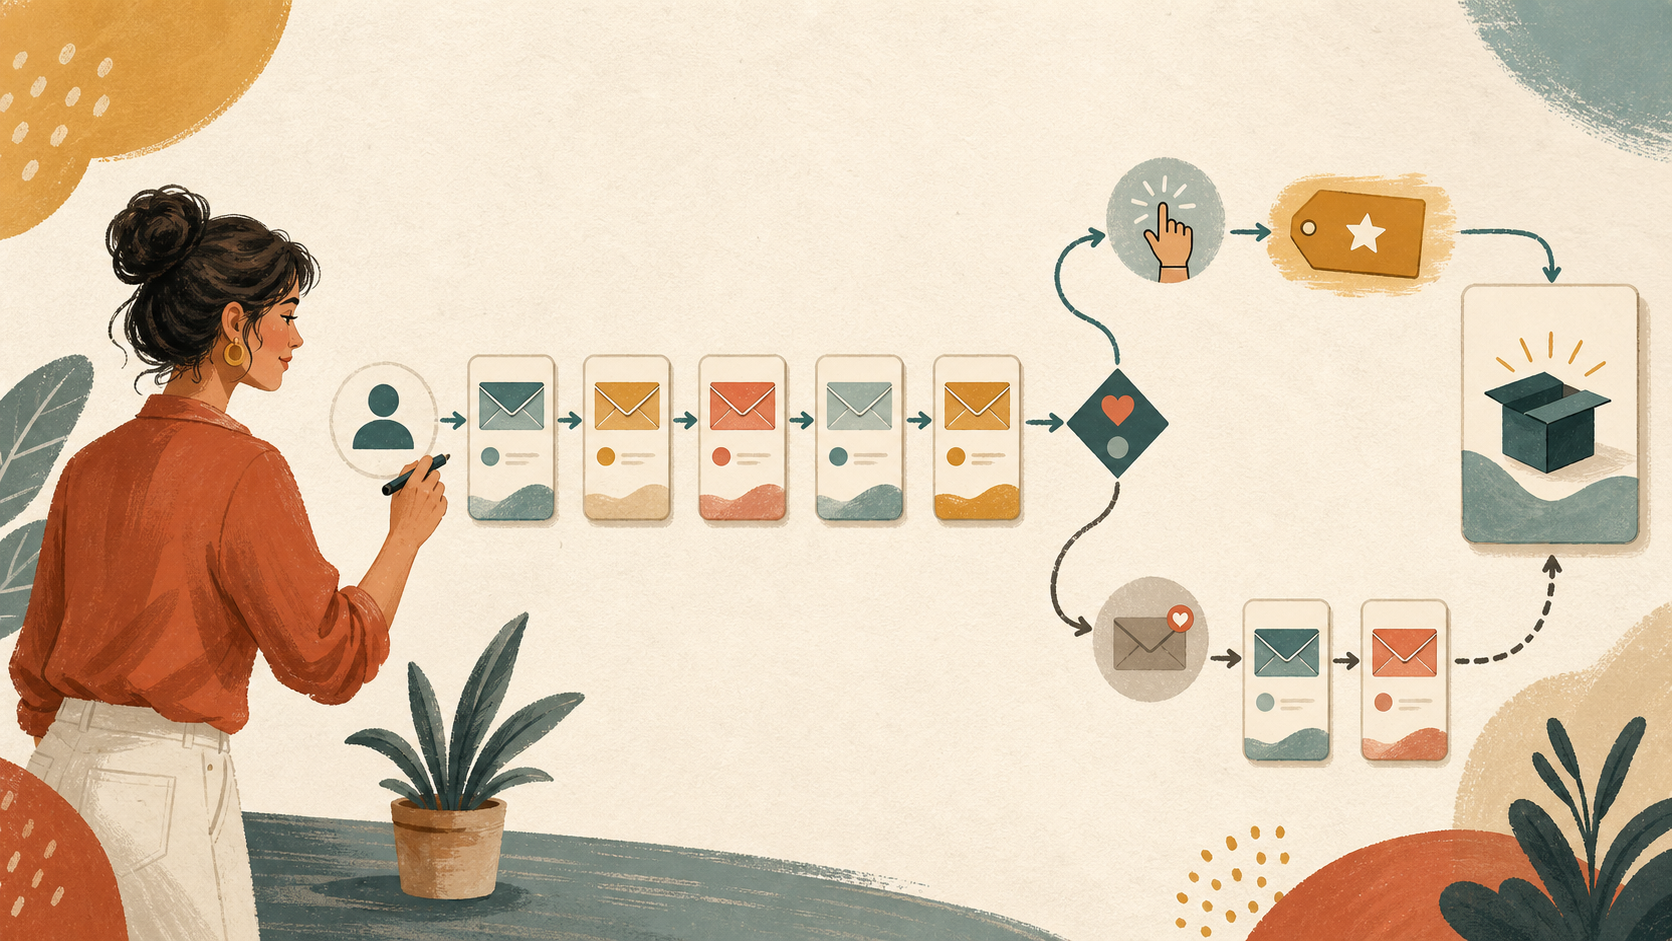
    A creator maps a five-email subscriber sequence that branches by engagement, applies a tag, and leads to a product offer.

    This is the sharpest functional divide between the two platforms.

    Kit ships with a drag-and-drop visual automation builder at its core — not as a premium add-on. You map out subscriber journeys on a canvas: someone downloads your lead magnet → enters a 5-email nurture sequence → clicks a product link → gets tagged “interested buyer” and moves into a sales sequence.

    [Image: Kit automation workflow — Lead Magnet Download → 5-Email Nurture Sequence → Product Link Click → “Interested Buyer” Tag → Sales Sequence]

    The logic is genuinely intuitive once you understand the concept, and it doesn’t require any coding.

    Mailchimp’s Customer Journey Builder supports automated journeys, while Kit centers its product around visual creator automations. Compare the exact branch, trigger, and integration features required by your workflow instead of assuming either plan includes every automation feature.

    Audience Segmentation & Tagging

    Kit uses a tag-based system: as subscribers take actions — submitting a form, clicking a link, buying a product — they receive tags automatically. You then use those tags to decide who gets which email. For example: if you sell a PDF guide, Kit can automatically tag everyone who buys it as “purchased” and remove them from future sales emails for that guide — without you manually updating any lists. It’s clean and logic-driven, and it gets more powerful as your audience grows.

    Mailchimp uses Audiences, groups, and segments — a structure that historically led to duplicate billing when the same subscriber appeared across multiple Audiences (meaning the same real person could count toward your billing limit twice). Mailchimp has addressed this with merged audiences, but the underlying architecture is more complex to maintain for a solo creator managing one engaged list.

    Digital Products & Monetization

    A creator delivers a digital guide directly to a buyer through one connected email and payment loop while a fragmented route adds complexity.

    This is Kit’s single biggest differentiator for creators.

    Kit lets you sell digital products, paid newsletter subscriptions, and one-time offers directly inside the platform — connected to Stripe, with revenue going straight to your account. No third-party storefront required. You can sell a PDF guide, a paid weekly newsletter, or a coaching package without touching Gumroad, Podia, or any separate tool.

    Mailchimp has no native digital product selling. You’d integrate with Shopify, WooCommerce, or an external product platform — adding fees and complexity. If you plan to monetize your list even modestly, this is a meaningful practical difference.

    Landing Pages & Forms

    Both platforms include landing page builders and embeddable opt-in forms. Kit’s pages are minimal and conversion-focused — well-suited for lead magnet pages and newsletter sign-ups, but not full website builders. Mailchimp offers slightly more template variety and styling flexibility.

    Neither replaces a dedicated page builder if you’re building a full funnel.

    Reporting & Analytics

    Mailchimp’s analytics are more detailed at lower price points — click maps, audience growth charts, and e-commerce revenue tracking are accessible even on Essentials. Kit’s standard reporting covers opens, clicks, and unsubscribes clearly, but advanced attribution (which email drove which sale) requires Creator Pro.

    If basic open/click data is all you need, both platforms are comparable. If you want to know exactly which automation branch is converting subscribers to buyers, Kit Pro’s reporting is worth the upgrade.


    Decision Table: ConvertKit vs Mailchimp for Creators

    Feature Kit (ConvertKit) Mailchimp
    Visual automation builder ✅ All paid plans ⚠️ Standard+ only
    Tag-based segmentation ✅ Yes ⚠️ More complex setup
    Sell digital products natively ✅ Yes ❌ No
    Paid newsletter subscriptions ✅ Yes ❌ No
    Free plan ✅ Yes (limited) ✅ Yes (250 contacts)
    Paid-plan comparison $33/month for Creator at 1,000 subscribers, billed annually Contact-, term-, region-, and promotion-dependent
    E-commerce integrations ⚠️ Basic ✅ Strong (Shopify, WooCommerce)
    Email template library ⚠️ Minimal ✅ 100+ templates
    Landing pages ✅ Yes ✅ Yes
    A/B testing ✅ Creator includes subject-line testing; Pro expands testing Plan-dependent
    Advanced reporting ✅ Pro Plan-dependent
    Subscriber referral program ✅ Pro Check current integrations
    Best for Creators, newsletters, courses Small businesses, e-commerce

    Worked Example: A Finance Newsletter Creator at 2,500 Subscribers

    A finance newsletter creator compares a lower monthly fee with a large storefront cut against an integrated route with a smaller transaction cost.

    Scenario: Maya runs a personal finance newsletter. She has 2,500 subscribers, sells a $197 “Debt-Free in 12 Months” PDF guide, and wants an automated 5-email welcome sequence that pitches the guide on Day 4.

    On Mailchimp Standard:
    – ✅ Can build the welcome sequence via Customer Journey Builder
    – ✅ Can send her weekly broadcast newsletter
    – ❌ Cannot sell the $197 PDF through Mailchimp alone — needs a separate storefront with its own current processing and platform fees
    – ❌ Mailchimp automation doesn’t natively tag purchasers to suppress future pitches without extra setup
    – 💰 Cost check: Use Mailchimp’s calculator for 2,500 contacts and add the current fees of the separate storefront you choose.

    On Kit Creator:
    – ✅ Builds the welcome sequence on the visual automation builder in under an hour
    – ✅ Sells the PDF through Kit Commerce; confirm current processing and platform fees before launch
    – ✅ Buyers are automatically tagged and removed from future pitch sequences
    – ✅ If Maya ever launches a paid newsletter tier, it’s managed in the same dashboard
    – 💰 Cost check: Use Kit’s calculator for 2,500 subscribers and confirm current commerce processing fees before selling.

    Conclusion for Maya: Kit consolidates more of her creator stack, while Mailchimp requires a separate selling tool for this workflow. The correct cost comparison depends on current contact-tier pricing and the storefront’s processing fees. If Maya ran a product-based store and did not sell digital products, the decision could flip.

    Pricing and plan details checked against the official pages on June 19, 2026. Verify them again before subscribing.

    ▶ Try Kit for free


    Limitations Worth Knowing

    No review that ignores weaknesses is worth trusting.

    Kit’s real limitations:
    – The template library is spartan. If you care about email design beyond minimal/clean, you may find it frustrating.
    – Kit’s most advanced analytics, subscriber intelligence, collaboration, and referral features require Pro.
    – The free Newsletter plan includes one basic Visual Automation, but unlimited automations and sequences require Creator.

    Mailchimp’s real limitations:
    – Automation has improved but still feels secondary to the broadcast-focused core product.
    – The contact-counting model and pricing structure have confused and frustrated users for years — always read the fine print on what counts toward your limit.
    – No native path to monetizing your list directly, which means integrating and paying for additional tools.


    Pick Kit (ConvertKit) If… / Pick Mailchimp If…

    Pick Kit if…

    • You’re a content creator, course seller, newsletter writer, or blogger
    • You plan to sell digital products, online courses, or paid subscriptions — now or in the future
    • Automation and subscriber tagging are core to how you want to run your business
    • You prefer a clean, minimal interface over a large template library
    • You’re okay paying slightly more for a tool that does more of your creator stack in one place

    Pick Mailchimp if…

    • You run a product-based small business with an active Shopify or WooCommerce store
    • You need the lowest possible monthly cost at small list sizes and won’t use automation heavily
    • You value a large pre-built template library and visual email design flexibility
    • Your existing business tech stack is already integrated with Mailchimp
    • You have no current or near-future plans to sell digital products through your email platform

    On switching costs: Migrating between email platforms is annoying but manageable. Export your list as a CSV, import it to the new platform, rebuild your automations (which you probably want to audit anyway), and update your opt-in forms. Budget a weekend, not a week. Don’t let migration friction lock you into the wrong tool for the next three years.


    The Bottom Line

    ConvertKit vs Mailchimp for creators isn’t a coin-flip decision once you know what you’re building. If you’re creating content, growing an audience, and want to eventually monetize that audience — through courses, digital products, or a paid newsletter — Kit’s architecture is genuinely aligned with how creator businesses work. The visual automation builder and built-in commerce features aren’t gimmicks; they’re what make Kit worth the extra monthly cost for a creator who plans to sell something.

    Mailchimp remains a solid, well-supported platform with a lower price floor and stronger e-commerce integrations. For the right user — a small business owner with an existing store and simple email needs — it’s a legitimate choice.

    The lowest-risk move: Start with Kit’s free plan to test the interface and landing page builder before spending a dollar. If it clicks, upgrade to Creator to unlock automations and commerce. If it doesn’t, Mailchimp’s free plan is also a zero-commitment starting point.

    Check current pricing and plan details at Kit’s official pricing page and Mailchimp’s pricing page before you commit — both platforms adjust pricing periodically.

    ▶ Try Kit for free